


originally published July 31th
Need for Mounting Data Outside of Container
The data or files created in a container basically exist in the container as default. Since the container is disposable, once the container is renewed (meaning trash the old container, and replace it with a new one), the data will disappear. However, putting the data or files on the host side, they are evacuated and are not deleted even though the container is suddenly stopped or trashed. The way of evacuating data on the host side is two ways, volumes, and bind mounts.
Volumes (Might be best practice)
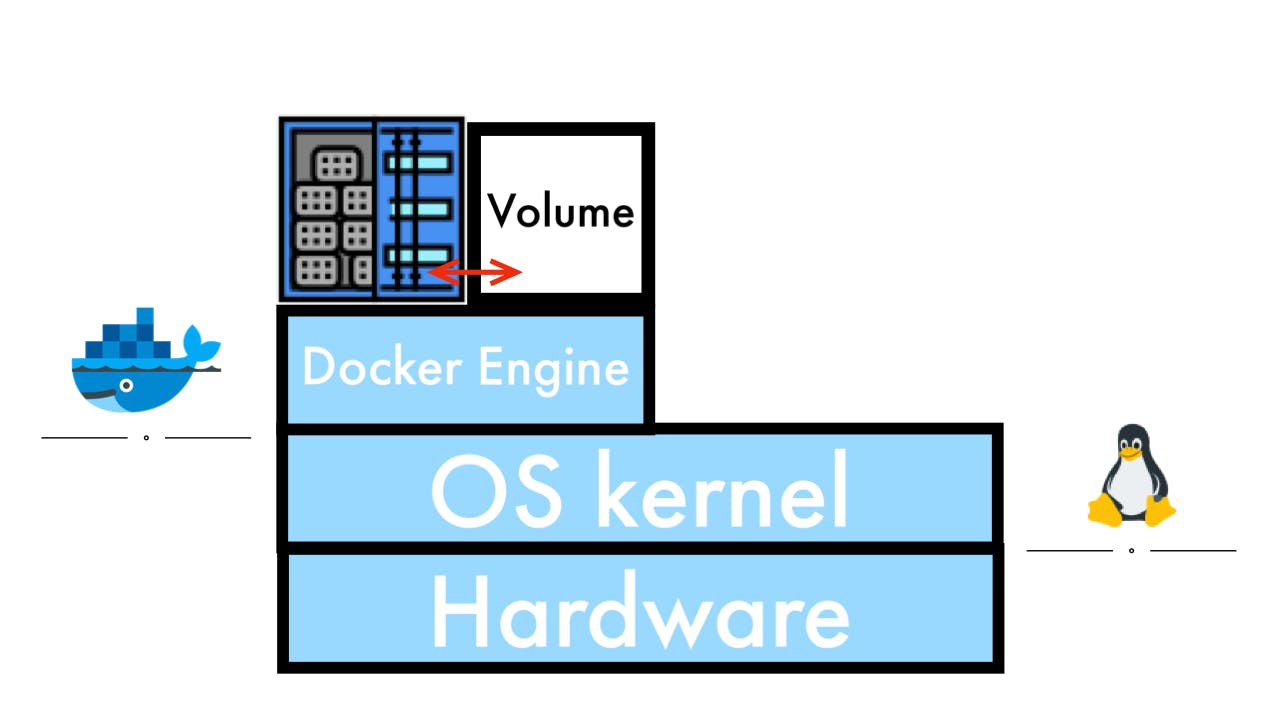
Volumes are created on the host side and managed by Docker. All of them are controlled through Docker. Volumes are created with the command docker volume create.
Advantages of Volumes
- Sharing the data among multiple containers safely
- Not relying on File System or File structure
- Using the Non-local Data (Can store the data in the cloud)
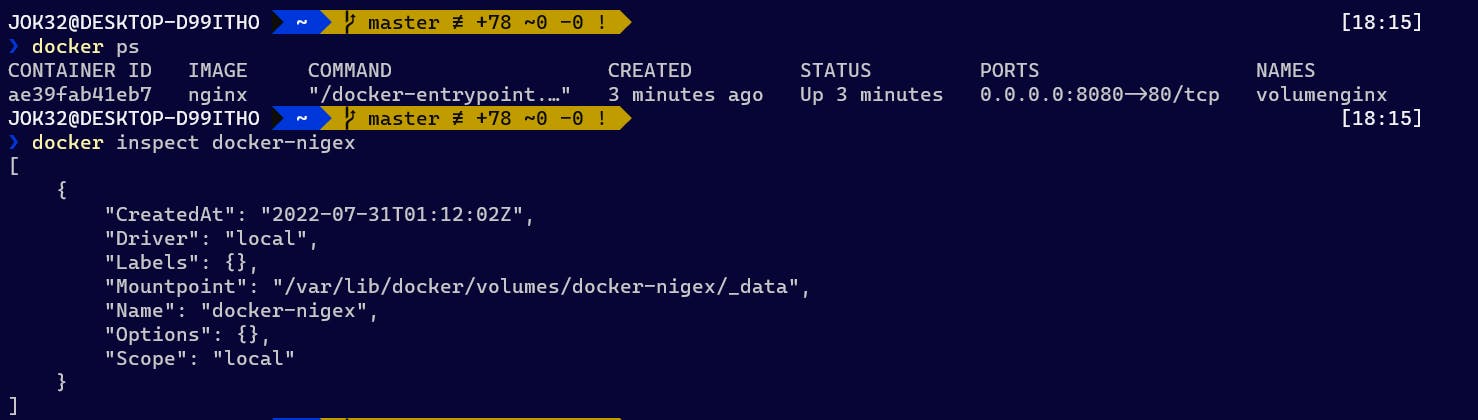
Example of Mounting with Volumes with Nginx
Before running the container, need to create volume first. Volumes can be created with docker volume create. This example creates a volume and names it docker-nigex.
❯ docker volume create docker-nigex
docker-nigex
This example mounts volume docker-nigex, names the container volumenginx, and connect 8080 to 80.
❯ docker run --name volumenginx -d -p 8080:80 -v docker-nigex:/usr/share/nginx/html nginx
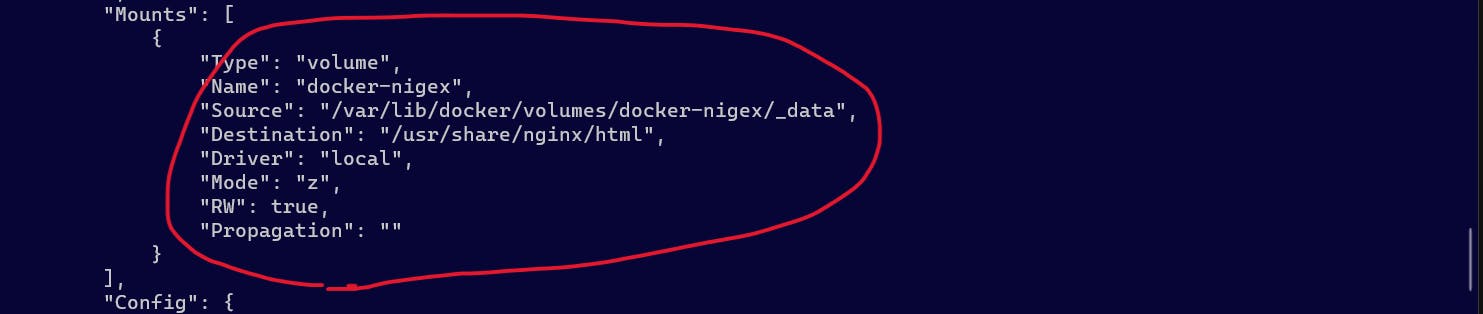
With docker inspect [OPTIONS] NAME|ID [NAME|ID...], can see the object detail information (either container or volume).
Volume detail information
With the command docker inspect volumenginxand seeing the section of "Mounts":, the detail container information exactly matches what you see docker inspect docker-nginx.
Container detail information

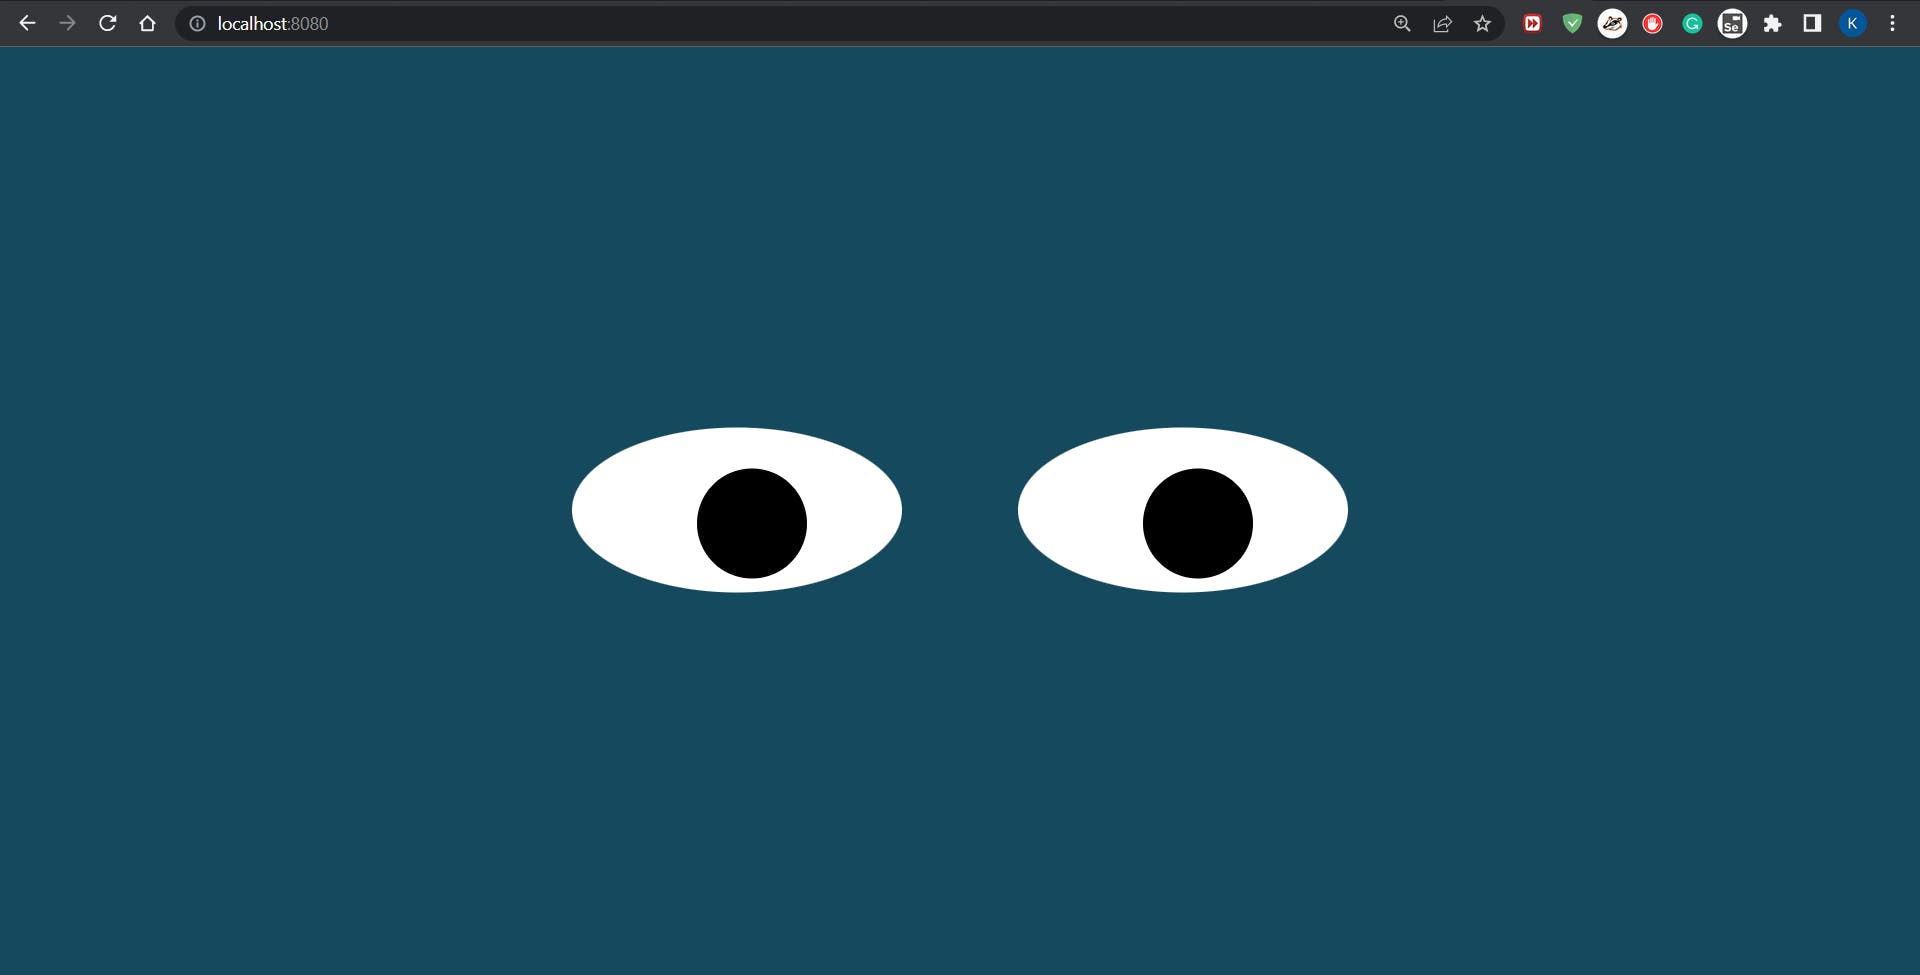
Creating the directory docker-nginx and placing the files below:
1.index.html
2.eye.js
3.styles.css
Copy the directory to the container.
docker cp C:\Users\JOK32\docker\docker-nigex volumenginx:/usr/share/nginx/html
Now, go to localhost:8080 again and see a display below:
Bind mounts
Bind mounts can be created anywhere on the host side. Bind mounts can be controlled with ease, but they rely on the host side much. Bind mounts can be utilized with the command docker run and option -v (short command of --volume). If the directory does not exist, the docker automatically creates the directory.
Advantages of Volumes
- Can use existing files or data
- Change can easily be seen
Example of Mounting with Bind Mounts with nginx
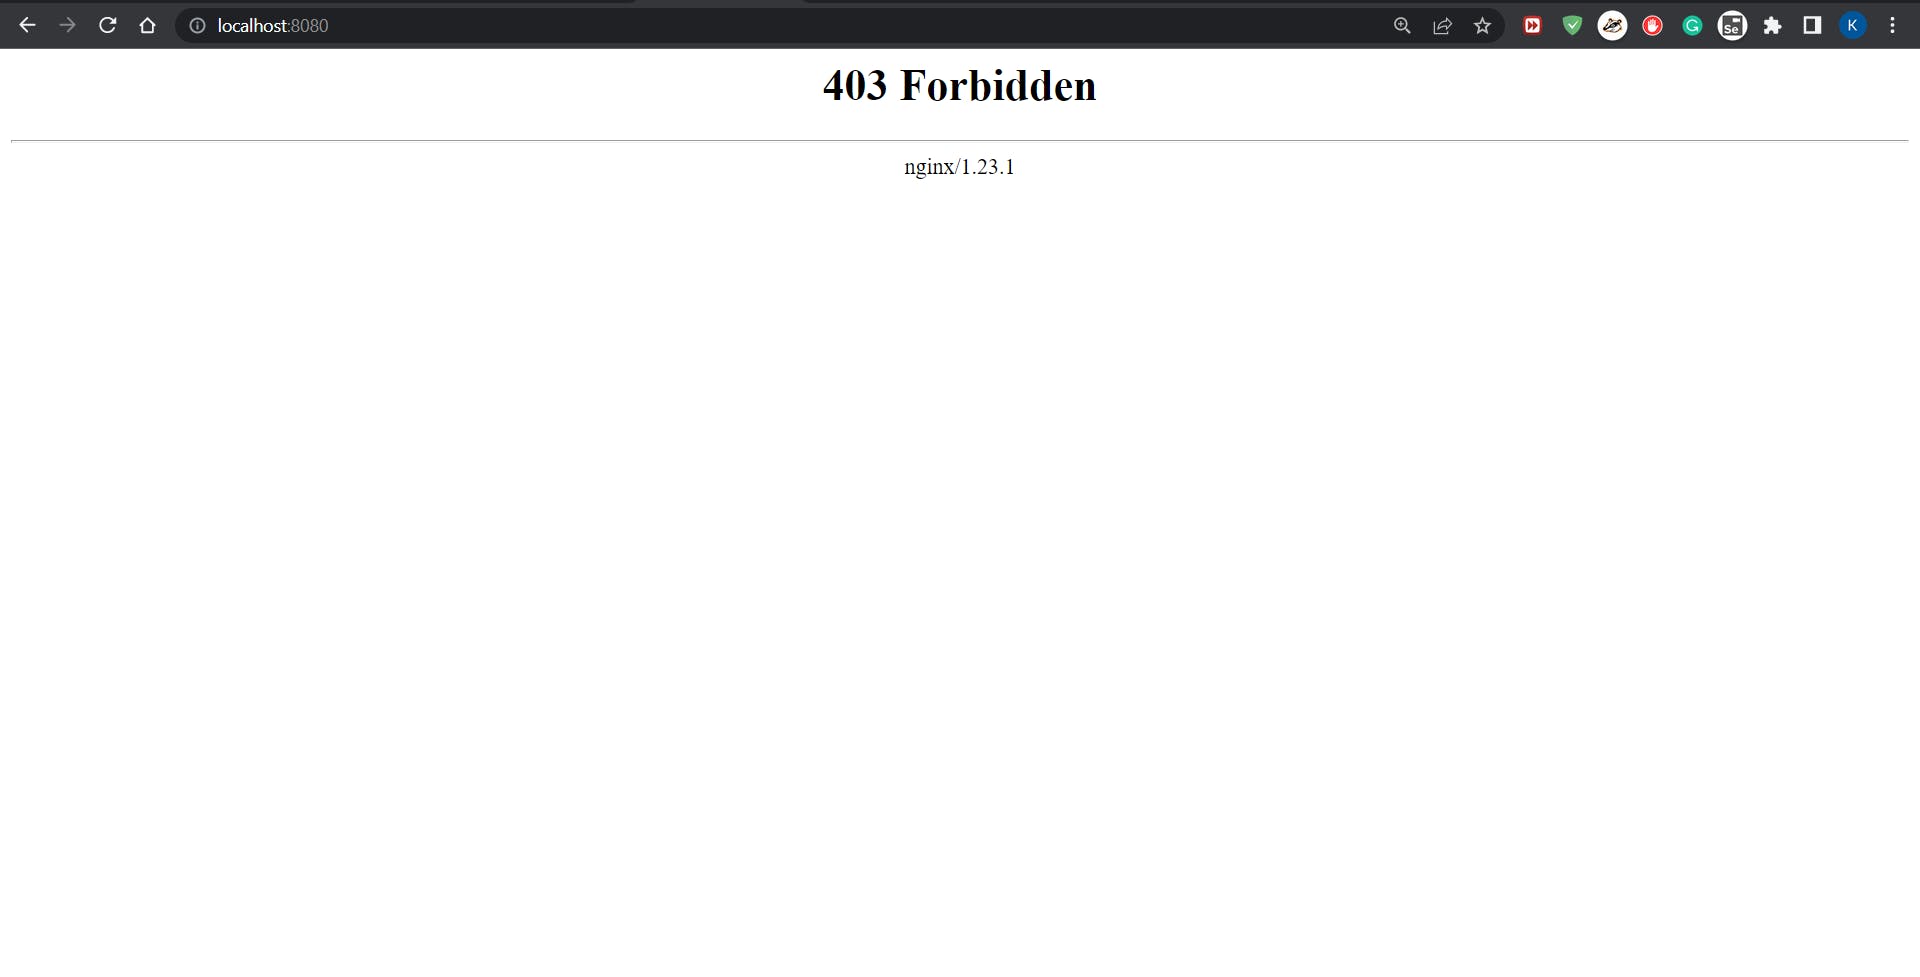
In this example, mounting existing directory C:\Users\JOK32\docker\docker-nigex (this directory is empty), named container as bindmountnginx, and connect port 80 to 8080.
Nginx reference(Dockerhub)
> docker run --name bindmountnginx -d -p 8080:80 -v C:\Users\JOK32\docker\docker-nigex:/usr/share/nginx/html nginx
go to localhost:8080.
Since there is no file in the directory, nigex just displays like below:
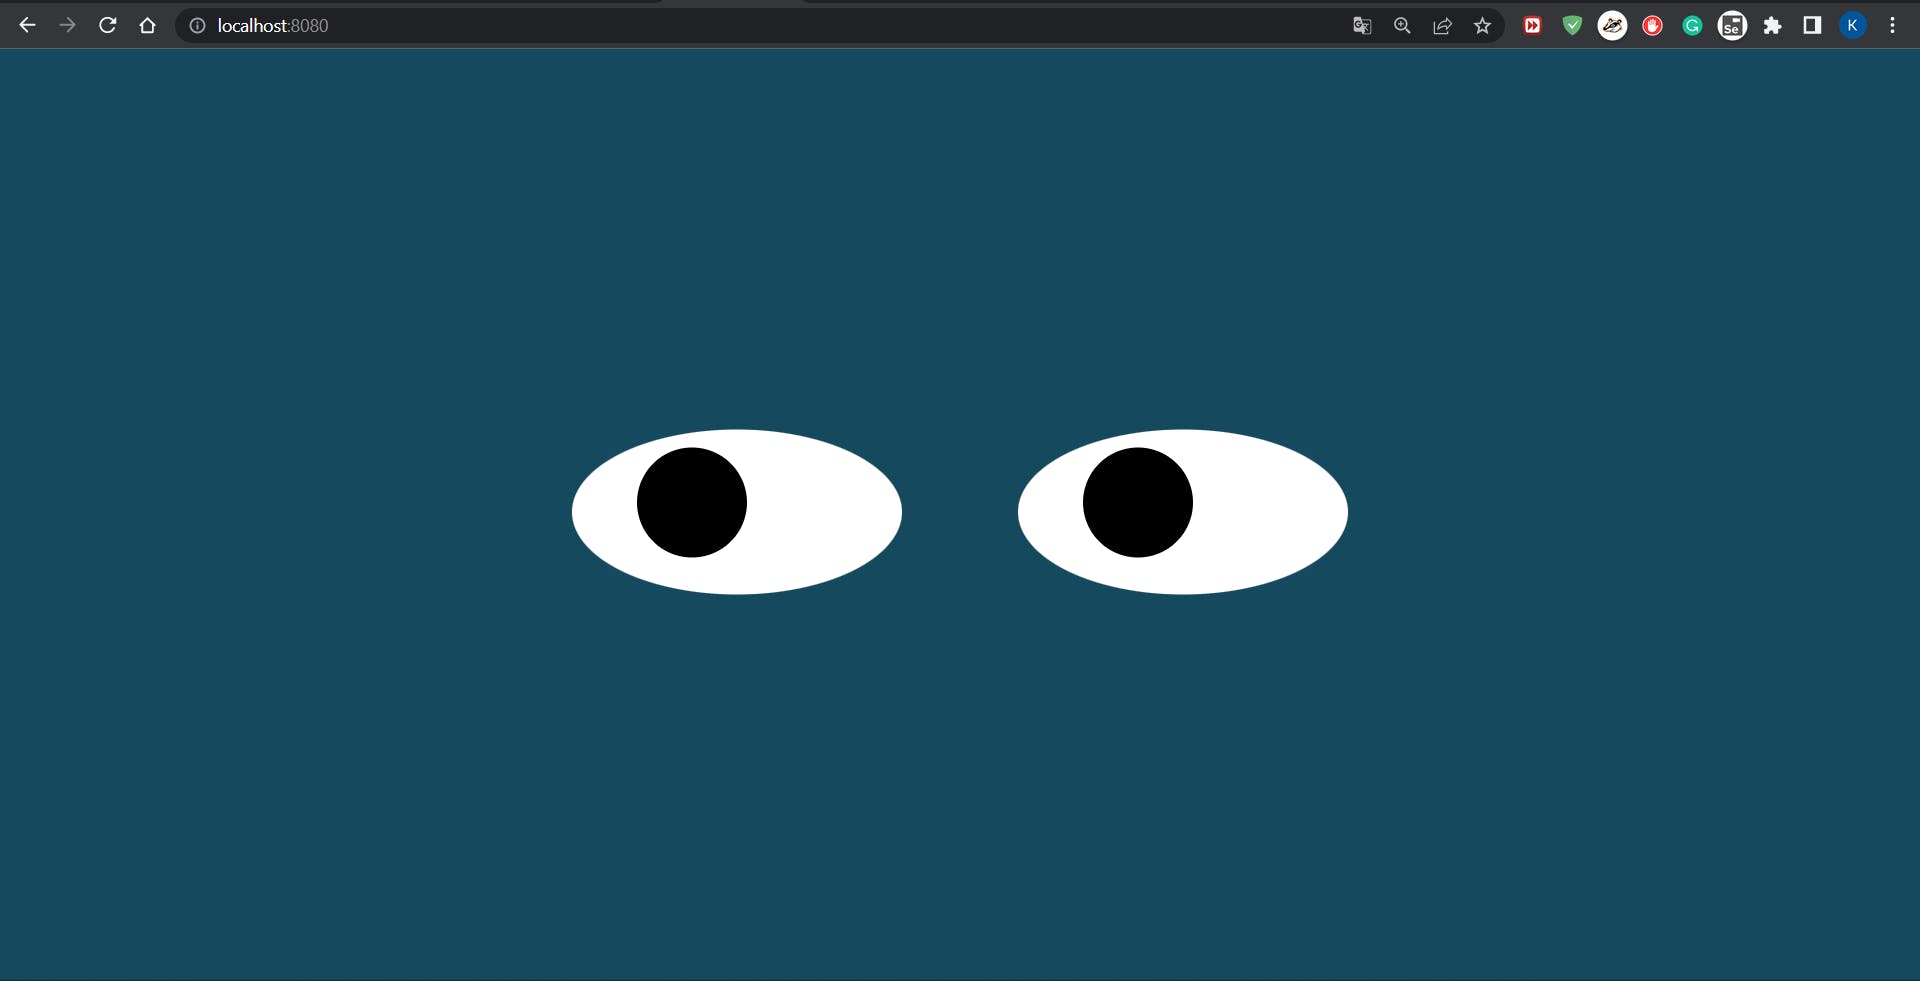
Putting files below under \docker\docker-nigex
1.index.html
2.eye.js
3.styles.css
nigex automatically displays what you want.
Any feedback always welcome!!